
Here follows a guide to getting started with Private Lessons. There are a few parts of the program that you will want to review. These include:
- Creating Sales Items for Private Lessons
- Assigning Sales Items to the PRIVATE class
- Adding Purchases to student accounts
- Enabling the Private Lesson tab for easy viewing, scheduling and management
- Enabling and Using the Purchases Tab
Also see: Setting Up Private Lessons
Creating Sales Items for Private Lessons
First, go to Settings > Sales Items, and click Add New, and you will see something like this:
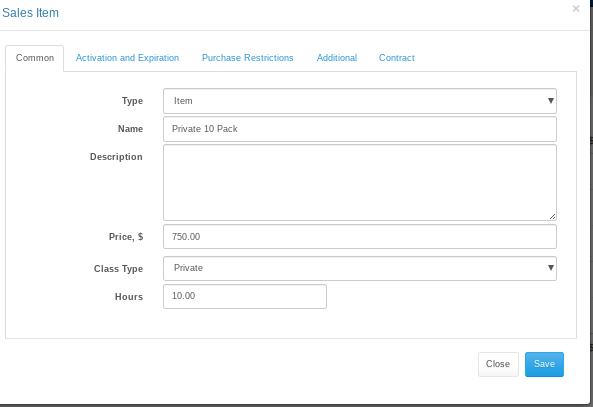
Notice the Type is Item. There is also Packages, which are essentially groups of Items, but first we must create items. Packages are not necessary, but are good for selling groups of items. Next notice that the Class Type is Private, we added a price and total hours, and saved.
Assigning Sales Items to the PRIVATE class
If you click on Classes in the main menu, there will be one called PRIVATE as show here:

Click on the one, and go to the Class Details, and then notice the Sales Items tab. Click on the Sales Items tab and you will see this screen:
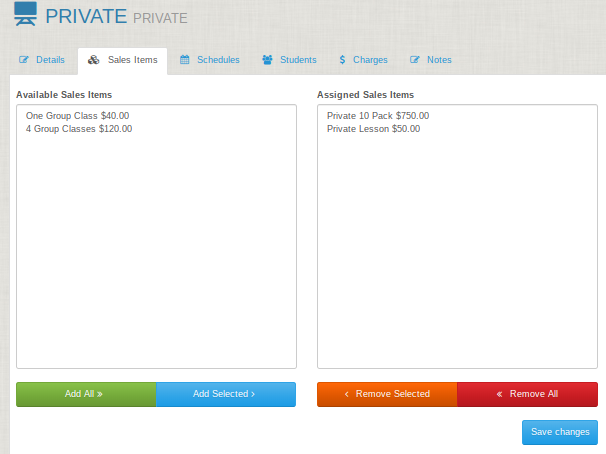
Simple move the item(s) you created over to the right side and you are good to go, because you have now assigned the sales item you created to PRIVATE, and you can sell it to students. Good job! 🙂
Adding Purchases to student accounts
If you go to Family/Student account from the main menu, you will see one of the tabs is called purchases. Click on that and you will see a screen like below:

And notice the button on the right where you can Add Purchase. Above you can see the Private 10-Pack was added.
Enabling the Private Lesson tab
Click on Settings > General Settings, and use the search at the top to search for Private Lessons Scheduler Enabled, and set to Yes as seen below, and save.
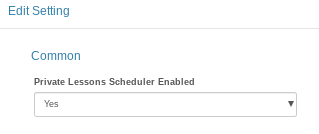
The result is you will have a new menu item. Congratulations! 🙂
Here you can sort and filter the private lessons in many ways. You can schedule privates, seach for students and see all their privates, and so much more. But let’s focus on two things. On the right side you see the Status, and there you can mark lesson as completed (or canceled late, early, etc). And on the left side, take special note of the little briefcase icon.

(in the middle above)
Click on this to Assign a private to a purchase! This is very important. Suppose the student not only buys a single private for $100, but also a larger 10-lesson package for a different rate. It is of course important to track which private goes with which package.
And you may also see there a Total Hours column to make easy to see how many lessons are purchased, scheduled and used.
Enabling and Using the Purchases Tab
Similar to what we did for the private lesson tab, simply go to Settings > Global Settings, and search for “Show Purchases in the Main Menu” as seen below:
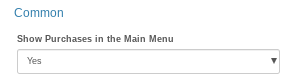
Voila! A new tab appears in the main menu!
This area of the program is especially useful if you are selling Memberships that expire and/or purchases that have automatic recurring payments. Accordingly, this is a good way to see what money coming in and what memberships/packages will soon be expiring. We will cover more about this in another tutorial.