
Using class locations feature in rooms:
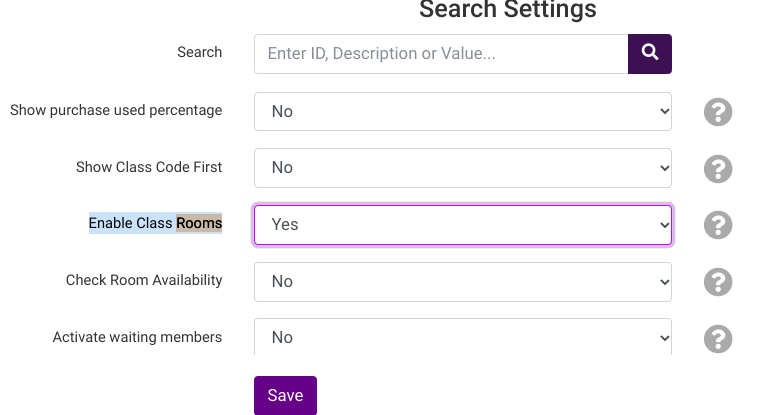
Rooms allows you to effectively manage and schedule classes by specifying a specific location for each type of class. This optional feature can be enabled in the “Global Settings” → “Common.” If enabled, the Class Location Category will be displayed in the Daily View, allowing you to easily edit the schedule for each class.
Please note that using Rooms will not prevent double booking of a room/location. It provides a room view and guidance for students on where to go but is not designed to stop you from booking the same room multiple times in the same time slot.
Creating Class Locations:
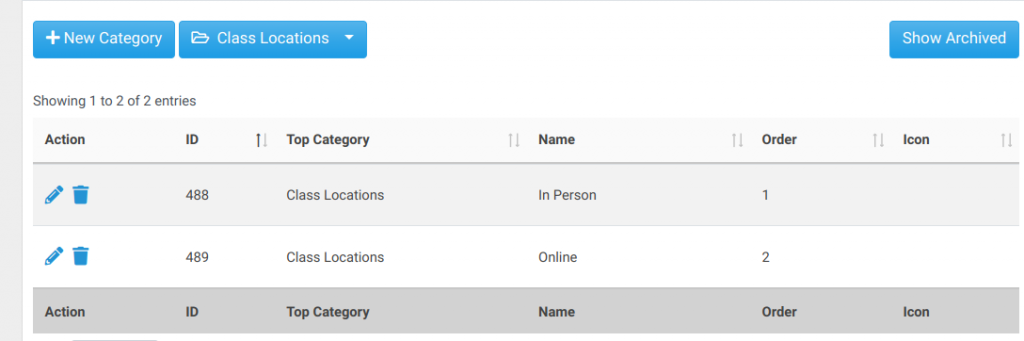
After enabling “Class Locations” system-wide, streamline your class management process by going to “Global Settings” → “Categories” and selecting “Class Rooms” from the drop-down menu. This will display the current list of class rooms available. Click “New Category” to add a new room or click the pencil icon to edit an existing room.
Scheduling Rooms/Class Locations
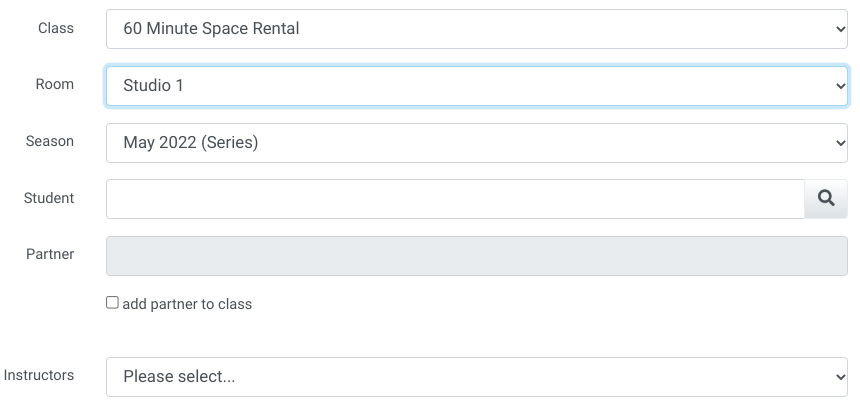
When creating each type of class or lesson, enhance your class scheduling by adding a room that you created in “Categories.” In each class creation, click on the “Room” drop-down menu to select the room to be displayed.
Multi Class Creation
When adding schedules to classes using the Multi Schedules button, the Room option is located under the date range, making it simple to manage multiple class schedules.

Private Class Creation
Similarly, when scheduling a private lesson, the drop-down menu will appear as the second field you must select, ensuring a streamlined scheduling process for private classes.
Editing the Room for an existing class schedule
There are two ways to update the room for an existing class schedule:
- Click on “Classes” and find the name of the class, or use the search in the upper right to find the name of the class. Once you are in the class, click on the “Schedules” tab, and find the date you want to edit and click the edit pencil next to the date. Then you can toggle the rooms drop-down list and change the location.
- Click on “Calendar” in the menu. Find the date of the class and click anywhere in the “white” space for that day, so you can then click on “View Day.” Then click on the class name, and you will see an “Edit Schedule” button.
Viewing Rooms on Calendars
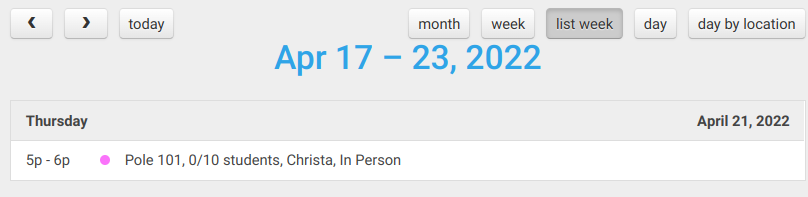
If “Class Rooms” are enabled, they will ALWAYS show up on the Class list, providing you with an at-a-glance view of class locations.
Benefits of the Class Location Feature
By using the Class Locations feature in Rooms, you can greatly enhance your class scheduling and management processes. Some of the key benefits of this feature include:
- Streamlined Scheduling: Assign rooms to specific class types, making it easier for instructors and students to know where each class will be held.
- Improved Organization: Keep track of all your class locations in one place, enabling you to maintain an organized and efficient class management system.
- Increased Flexibility: Easily edit and update room assignments for existing class schedules to accommodate changes or unforeseen circumstances.
- Enhanced User Experience: Provide clear guidance to students on where their classes are located, reducing confusion and improving their overall experience.
Incorporating the Class Locations feature into your class scheduling workflow can lead to better organization, flexibility, and overall user satisfaction for both instructors and students.