
In this tutorial, we will be going over many of the most commonly used features of the Online Client to help you get everything setup.
Logging In
If you additional assistance, of course we are ready to help. In DSM, you have a folder name like …
clients.dancestudiomanager.com/name-of-your-studio/admin/
…which is the area you log into as the administrator, and you also have…
clients.dancestudiomanager.com/name-of-your-studio/client/
…and this is the link that you and you clients use to login to the online client. As an administrator, there is also a very handy feature where you can quickly login to one of your client’s accounts as if you were them, so you can see exactly what they see. From the Families/Students page click on the name of the family, and you will see a menu like below. You click “Login as Client”

Displaying the Classes
Assuming you have already created classes, there are a few ways to display the classes, however the below settings would be considered the “default” or most common method. To get to the section with the below image click on Settings > Online Client, and then scroll down to Classes List.
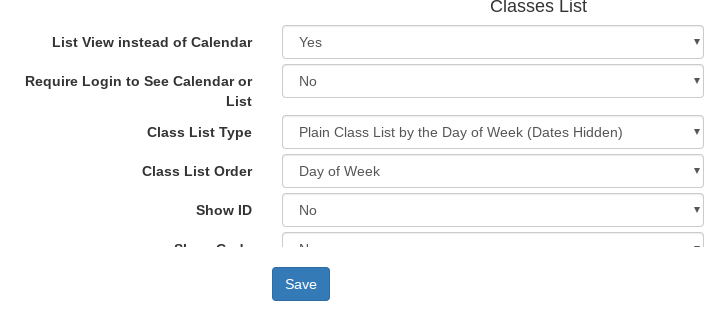
List View means we show classes as a list rather than a grid style calendar. In the past the grid style was more popular, but the list style is generally best as it works best on all devices (PC, mobile, etc.)
Require Login Means that only a registered user who is logged in can see the class list. Most of the time this is set to “no” as most studios want anyone to be able to see their class offerings.
Class List Type offers many variations, but “Plain Class List by the Day of the Week (Dates Hidden)” is the most commonly used. There is a separate tab for each day of the week (for which there are classes), and the client can click on the day to see what classes are offered. Dates Hidden means that we don’t show the actual date the class meets, only the day of the week.
After this you will see many fields related to “Show”ing something, and you can play around with which information you prefer to show, and of course it is good to strike a balance between showing the important information without too much clutter!
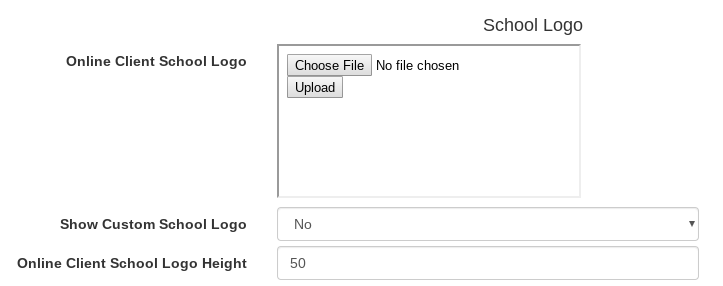
School Logo
Still in Settings > Online Client, if you scroll down closer to the bottom, you will find school logo. Most image formats, like PNG, JPG, GIF and more, can be uploaded. It is recommended to use a logo that has a length greater than the height for more elegant display. You can see also there is a Height control you can change to your liking. Of course, you must set Show Custom School Logo to “Yes”. 🙂
User Agreements
Whether you want to have a simple check box, or have an agreement the client must sign with their mouse or finger, both are available. Here is an example of the signed agreement process:
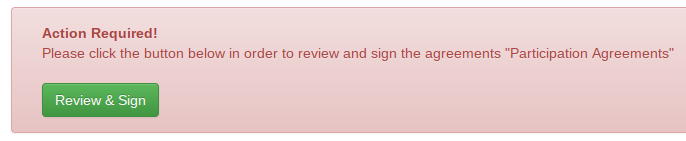
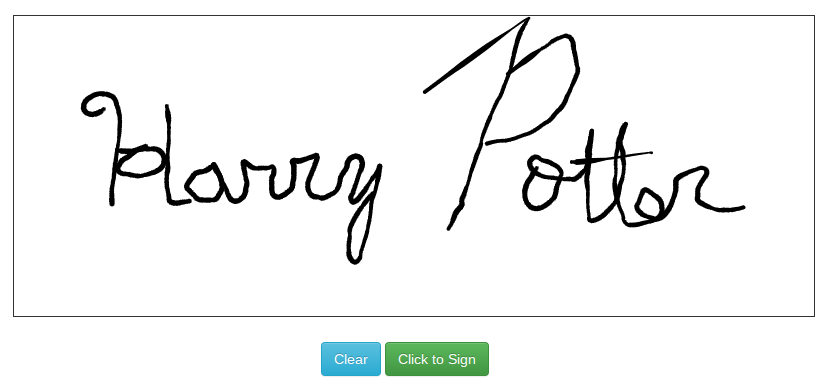
After they click review and sign, there arrive on a screen with all of the text of the agreement, plus a box at the bottom where they sign like this…
So the next question is… how do I create these agreements? Good question! 🙂 In the admin go to Settings > Pages, and click New Page, and you will see something like this…
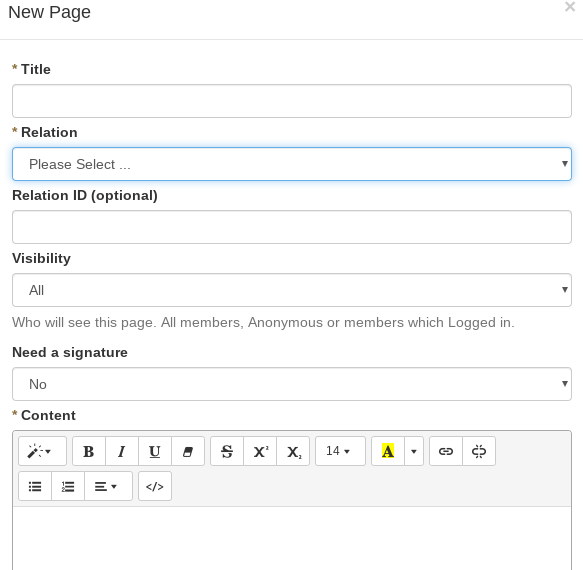
So give it a title such as User Agreement, Payment Terms, or Photo Release. Next under “Relation” you have these options…
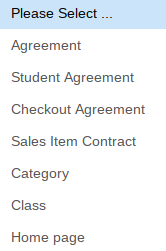
Agreement is what someone sees at the bottom of their Registration page when they are a new client registering for the first time. Student Agreement is similar, but it is for each student that is added. Checkout Agreement of course is shown as they are checking out with their purchase. Sales Item Contract is for people that are using Passes and Memberships, and in order to buy a specific membership, they agree to the terms. Class of course is for a specific class, and Category is for people registering for some category of classes. And the Homepage is useful for required a new agreement for existing users.
And finally “Require Signature” toggles between have a checkbox or a signature.
Viewing the Waivers
Now after people have signed waivers, if you wish to see who signed waivers and who didn’t or even need to print a PDF of a signed waiver, you can manage this under Reports > Waivers in Admin.