Gift cards are a great way to encourage your students to recruit their friends to come to your dance school for the first time, and they make great gifts for holidays, birthdays or special occasions. Let’s dive right in and go through the steps needed to get gift cards set up correctly.
Create a Notification Template to Send the Buyer after Purchase
First let’s create a template that will be used to send the purchase information to the purchaser so they can share it with their friend. From the Admin Dashboard, go to messaging, and then select New Email. Take a look at the example below:
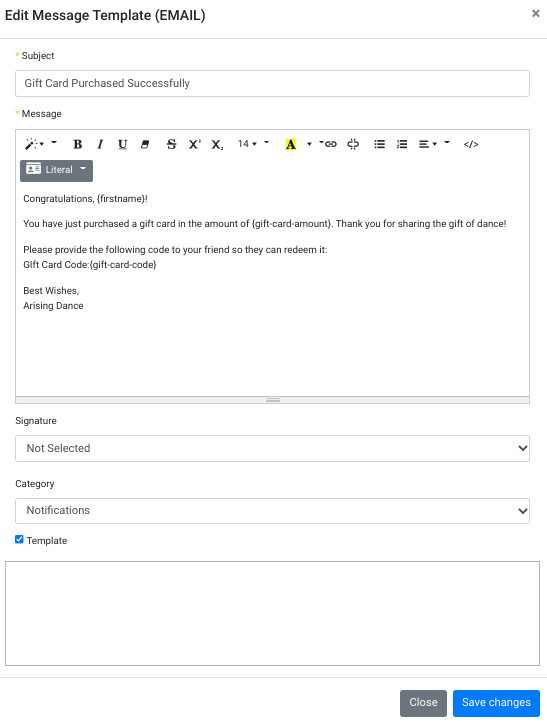
Some notes about the above image:
- We gave the email a subject: “Gift card purcased successfully”
- We types the Message, and Literals were used so that when we send the email it will automatically fill in the Gift Card Amount, Gift Card Redemption code, and the purchasers first name. You can click on the Literals button to find and select these, or you can type them directly using the curly brackes, ex. {firstname}.
- The Template was selected, which means we will be able to use this email template as a notification each time someone buys a gift card.
- Also worth noting: you can click on the big rectangle above the Close and Save Changes buttons if you want to add an attachment. Perhaps you want to provide the purchaser with a PDF certificate they can print and send to their friend (though they will still need to fill in the amount, and redemption code themselves on the certificate).
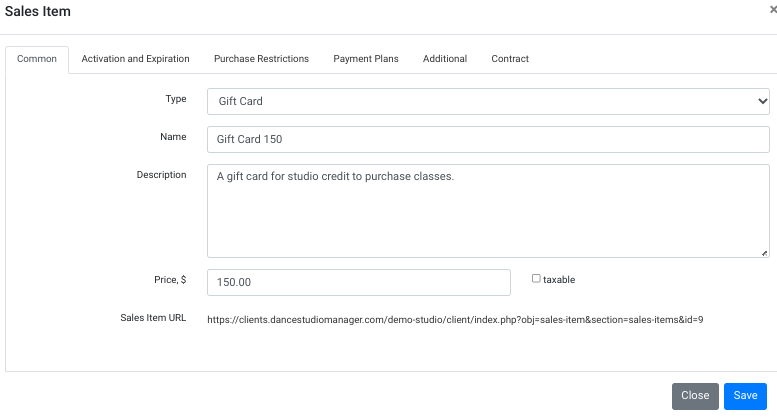
Create a Gift Card Sales Item
From the Admin Dashboard, go to Settings > Sales Item, and click on Add New. Have a look below at how we filled out the fields:
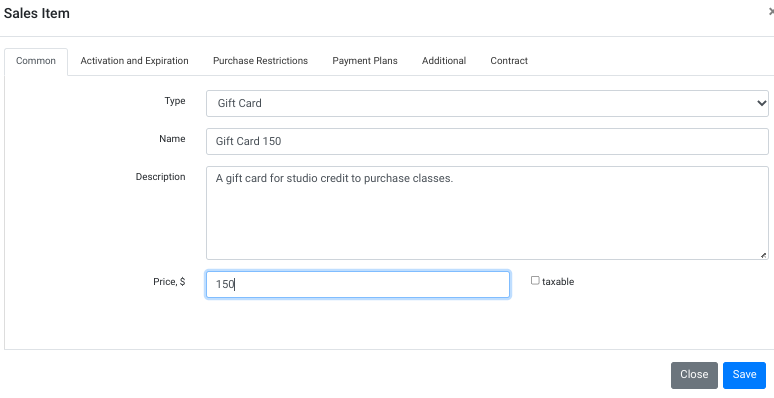
Most important is to select Gift Card for the Type, and then you can set the Name, Description and Price. Then under the Purchase Restrictions tab, make sure Sell Online is set to Yes. That way clients will be able to purchase the gift cards in the online client, the app or the WordPress API. You make also want to set the Sale End in the case you want them to expire after some period of time. Next go to the Additional tab, as it is important that we select the Email Template that was created in the previous step as shown below:

Once you have everything filled out for this new Gift Card Sales Item, go ahead and save it, and now it will be available for same in the Admin Shopping Cart and other places.
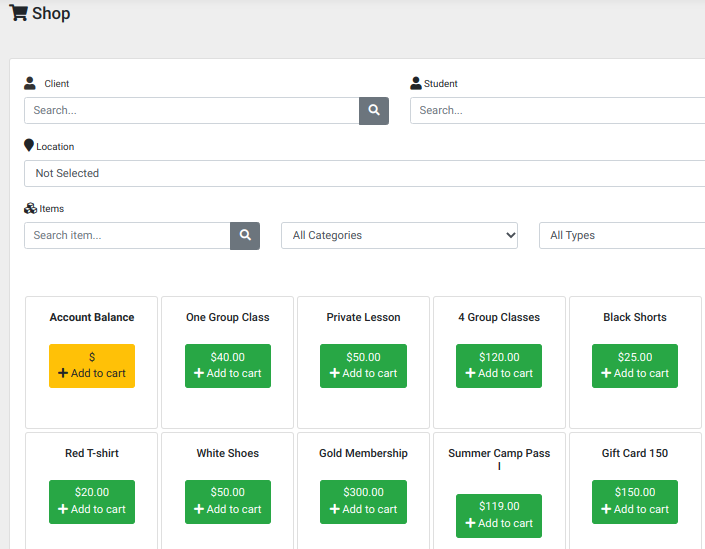
Gift Cards in the Admin Shopping Cart
From the Admin Dashboard, click on Shopping Cart, and you will see the newly created Gift Card is now appearing as shown below (bottom right corner):
Gift Cards in the Online Client
To make gift cards available in the online client, from the Admin Dashboard, go to Settings > Online Client, scroll down to the common section, and you will find following:
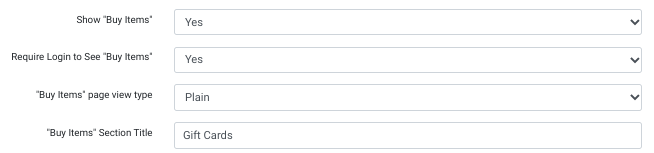
Here are some notes about the above:
- The Show “Buy Items” enables a new tab in the online client that lists items like dancewear, class cards, and gift cards that are for sale.
- Require Login to See “Buy Items” (if set to Yes) means non-logged in users cannot see this section.
- The “Buy Items” Section Title can be anything you like. In this example we named it Gift Cards, but you may have other items for sale there too, in which case you might change the name (ex. Purchase Items).
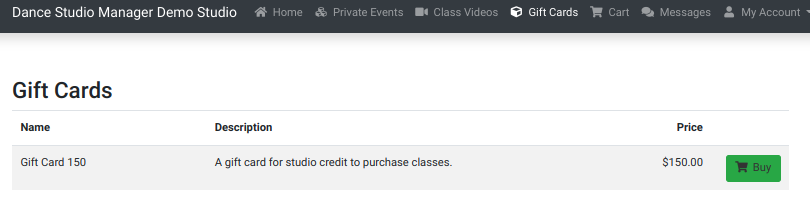
One the gift card is listed in the online client it will look something like the below image:
Or if you chose the “tab”view rather than the “plain” view it will look something like this (with all gift cards in their own tab.
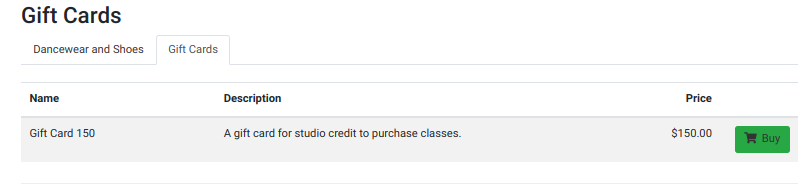
Notice that the tab had a name too (Gift Cards). In order to achieve this, there are two quick steps needed.
- From the Admin Dashboard, go to Settings > Categories, and find Purchase Items category, and create a new category called Gift Cards.
- Next go to Settings and Sales Items, and locate the Gift Card sales item that you created. In the Additional tab, find Item Category, and assign it to the category you just created in step 1.
Final note about selling gift cards in the online client, notice at the bottom of the page when editing the sales item, there is also a URL for that sales item. So you can also send people a direct link.