Scheduling
Use the class calendar and schedule a private event
#Know which page to use
| Page | Purpose |
|---|---|
| Home or Calendar | Discover scheduled classes by month, week, or list and open an eligible registration action. |
| My Classes | Review classes already scheduled or previously attended for your family. |
| Private Events | Build a staff/availability-based private event and add its Sales Item to Cart. |
| Private Lessons | Review purchased, scheduled, remaining, upcoming, and history information; client write actions are currently unavailable there. |
Your studio can change labels or hide one of these destinations.
#Browse the class calendar
- Open Calendar from an available client link, including View on calendar from Private Lessons when shown.
- Use Previous week or Next week to move through the schedule.
- Choose Month, Week, or List.
- Read the legend for Book now, Wait list, and Cancelled.
- In List view, review the date, time, class/genre, location, instructor, and any Booked or Waitlisted badge.
- Select an available class row or registration action to review its details.
The calendar can display schedules for which the current family is already booked or waitlisted. The badge is a status cue, not a second registration button.
#Understand calendar status
- Book now means the schedule can offer a registration path, subject to student eligibility, capacity, season, price, and checkout.
- Wait list means the class can offer a waiting-list path when full or otherwise configured.
- Booked means the current account is already enrolled in that schedule.
- Waitlisted means the current account is already on its waiting list.
- Cancelled identifies a cancelled schedule; do not treat the time as available.
Select Go to My Classes when you want the family's scheduled and past records instead of the discovery calendar.
#Start a private event
- Select Private Events in the top navigation.
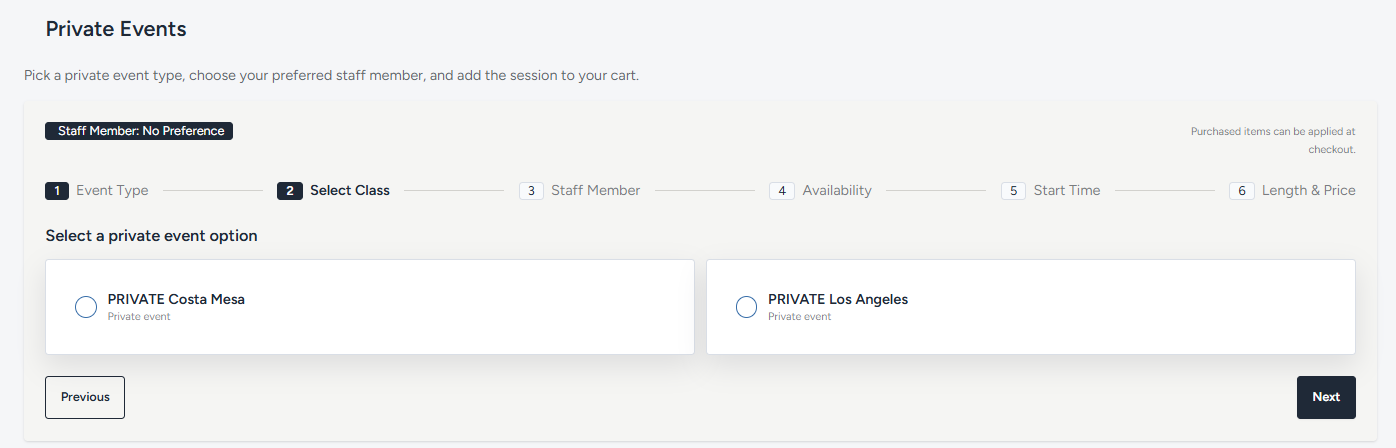
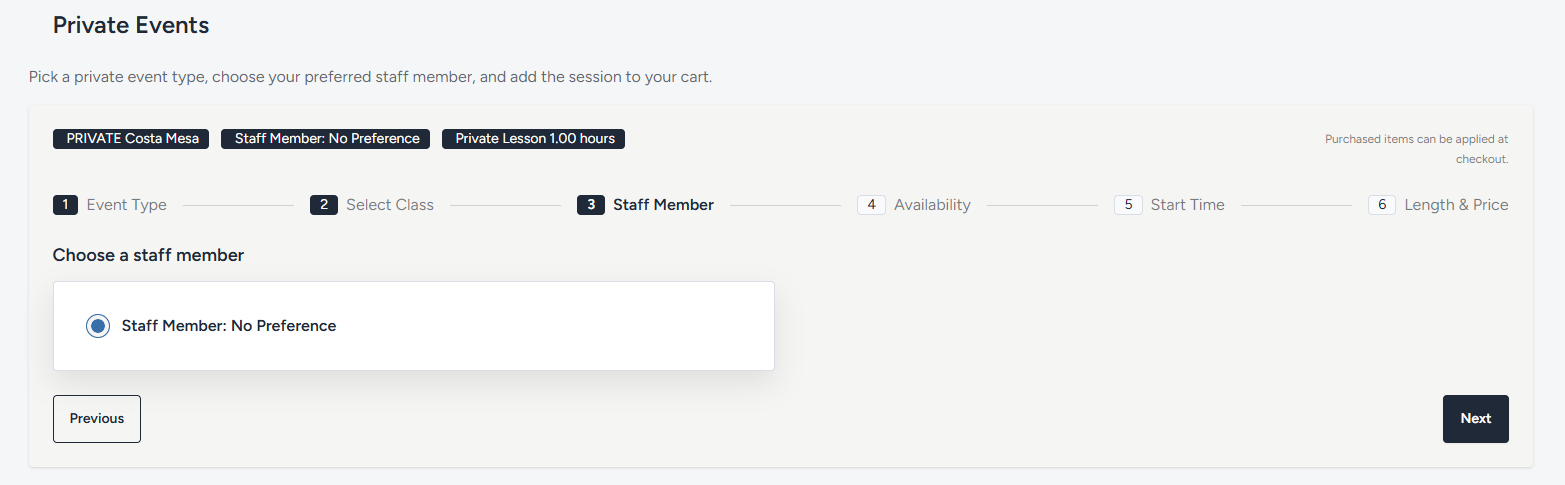
- Read the page description and the six-step indicator.
- Under Event Type, select the intended private event option.
- Select Next.
- Under Select Class, choose the service or class offered for that event type.
- Under Staff Member, choose an instructor or leave Staff Member: No Preference when appropriate.
- Under Availability, choose an offered date block.
- Under Start Time, choose an available start.
- Under Length & Price, choose the intended Sales Item or duration/price option.
The page summarizes selections as you progress. Use Previous to correct an earlier step rather than starting a second booking.
#Add the event to Cart
- Review the selected event type, class, staff preference, date, start time, length, and price.
- Confirm whether the page says purchased items can be applied at checkout.
- Select the final add-to-cart action once.
- Wait for Cart to open.
- Confirm the private-event line, student, date/time metadata, price, and any available purchase application.
Important: Adding the event to Cart is not a confirmed booking. The server rechecks the selected start time, and the order still requires checkout. If another booking takes the time first, choose another offered start.
#Complete and verify checkout
- Review the complete Cart, including any class, item, fee, discount, credit, gift card, or payment-plan line.
- Complete required agreements or waivers.
- Review the final amount and payment method.
- Submit checkout once.
- Wait for the confirmation page.
- Check the appropriate schedule or purchase record and any confirmation supplied by the studio.
Do not repeat the private-event wizard after an uncertain checkout. First inspect Cart, Purchases, Finance, and the schedule information for an existing result.
Warning: Checkout can create a charge and payment. Use only an authorized payment method and do not expose card, bank, gift-card, or private-event identifiers in screenshots.
#Confirm it worked
For the class calendar, compare the visible badge with My Classes for the same student and schedule.
For a private event, verify all of the following:
- checkout reached confirmation;
- the purchase or order appears under the correct account;
- the event date, start, duration, staff preference, and location are correct;
- any purchased-item credit was applied as shown; and
- the finance record agrees with the confirmed order.
#Troubleshooting
#Calendar opens on an unexpected week
Use Previous/Next to reach the intended dates. The client calendar can remember an earlier view or date in the browser.
#A class says Booked or Waitlisted
The current family already has that schedule status. Open My Classes to review it instead of registering again.
#Private Events is missing
The studio may disable the scheduler or use a custom label. Contact the studio if you were told to use it.
#No event types or classes appear
The studio needs an active private-event class, category, Sales Item, and Online Client setting. Ask the studio to confirm the offer is available.
#No staff or dates appear
Choose No Preference when offered, broaden the availability window by using the page controls, or contact the studio. Only configured instructor availability is shown.
#The selected start is no longer available
Another booking or schedule change occurred after the list loaded. Return to Availability and choose a new time; do not repeatedly submit the stale time.
#The event is in Cart but not on the schedule
Cart is not confirmation. Complete checkout and verify the resulting schedule/order. If checkout already completed, contact the studio with the confirmation and event date.